The seniors’ computer club is going well and the ladies are always so enthusiastic. Last week we played with the paint program that comes with Microsoft Windows and had great fun drawing houses. Imagine all the grandchildren who’ll be putting gramma’s creation on the frig for a change!
Would you like to try your hand at creating a house yourself? How about a room interior? Wouldn’t it be nice to draw the perfect room with all of your favorite things for people to see when they entered?
Try to follow the steps below and be sure to post a comment or image of your project. I would love to see how they turn out.
-
-
-
- You need to start with a new file that is 1600 x 1200 pixels. In order for you to proceed with the next steps, you will need to know how to create layers. We will be creating quite a few in this tutorial.
- Add a new layer with a name of “guide lines”.
- Next you are going to need to install a plugin called Bordern N Shapes which can be found here: https://forums.getpaint.net/topic/4128-borders-n-shapes/
- Once you have installed the plugin, create a border around the guidelines layer that has a width of 10. You can keep all the other settings at the default.
- You are going to need to install another plugin called Tile Image and you can find that download on this page here: https://forums.getpaint.net/topic/8043-curtis-plugin-pack-update-for-354/
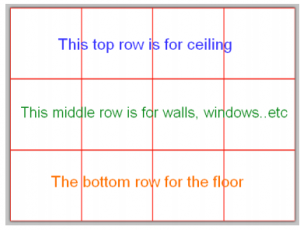
- Now you are going to create a grid that is 3 down and 4 across(ie 3 rows and 4 columns)

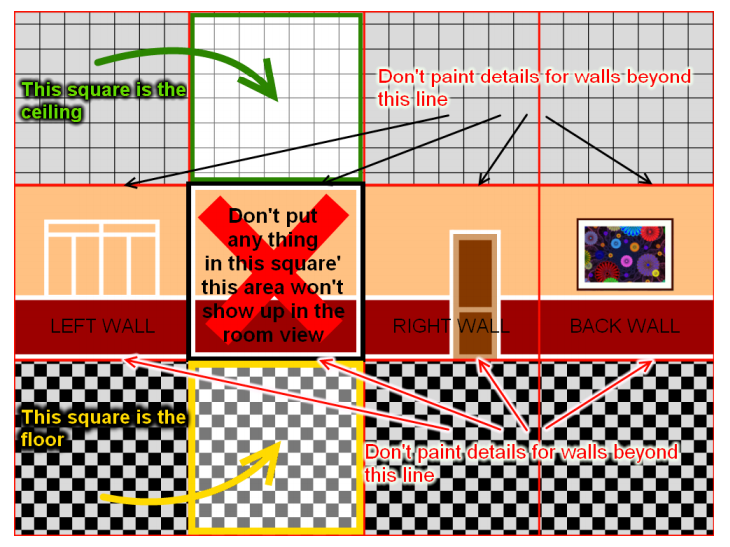
- OK. So now we are going to make a new layer. This one we will name ceiling. Move it to under the guidelines layer on your right hand side where you should see your task panel showing all your layers. Quick tip for you: You can use this Grid/Checkerboard maker plugin and create a grid that is black and grey with a size of 57 x 57.
-
- Now above the ceiling layer you are going to make another layer called the floor. Select the lower half and paint it with any style you want. You could again use the grid maker plugin and this time make a checkerboard with white and black squares that are size 29. You can of course, choose your own colors as you would like.
- The next layer is going to be the walls. Paint your wall in the middle row of 4 squares in the guidelines. Fill those 4 squares with details. Look at the image below so you can get an understanding of how you should construct your room.

- Finally add another layer and name it “Windows, Doors, Paintings, etc” Then paint the windows, doors, archways, or paintings.
Have fun and play around! Hopefully by the time you are done, you should have something that resembles this:

-
-